


By Getty Stewart, Professional Home Economist
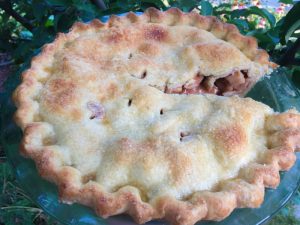
Thanks to Fruit Share I’ve had the chance to pick a large variety of prairie apples. They’re so delicious and perfect for making pie.
I had so many apples, I ended up freezing some. Which begged the question – can you make great tasting pie with frozen apples?
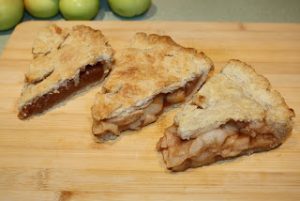
My family was glad to assist with the experiment. They were the taste testers and helped me test three variations of pie:
1. Apple Pie with fresh apples
2. Apple Pie with frozen, not thawed apples
3. Apple Pie with frozen, thawed apples
Here are the results:
1. Apple Pie with Fresh Apples
A fantastic apple pie recipe with a flaky, tender crust and a filling with soft apples coated in a light, thick sauce. This was our favorite method of all.
Crust
2 cups all-purpose flour
1tsp salt
1 Tbsp sugar
6 Tbsp cold butter
6 Tbsp shortening
1 Tbsp vinegar
5 to 7 Tbsp ice water
1 tsp soft butter
Filling
6-7 cups sliced apples (use 2 or 3 different varieties for best flavor)
1 Tbsp lemon juice
3/4 cup sugar
1 ½ Tbsp cornstarch
1 tsp cinnamon
1/4 tsp salt
1 Tbsp Cider Vinegar
Crust
Sift together flour, salt and sugar in a large chilled bowl.
Use a pastry blender to cut in butter and shortening until crumbly.
Sprinkle vinegar and the smallest amount of water over the flour mixture.
Mix with a fork just until ingredients come together to form a ball. If needed, add a drop of water at a time until ingredients stick together.
Pat into a flat ball, wrap in plastic wrap and refrigerate for 30 minutes or longer.
Filling
Wash, core, peel and slice apples.
Toss sliced apples in a bowl of water with the lemon juice to prevent them from turning brown.
Mix sugar, cornstarch, cinnamon, and salt.
Drain apples well and mix with the sugar mixture and cider vinegar.
Let rest while rolling out pie crust.
Assembly
Preheat oven to 450˚F.
Place oven rack in lowest position.
Divide dough into two pieces. Leave one piece in the fridge.
Lightly flour a rolling pin and section of counter top.
Roll dough into a 12” circle. To prevent sticking, lift and turn tough frequently.
Fold the dough over the rolling pin and transfer to 9-10 inch pie plate.
Brush bottom of dough with soft butter to prevent filling from making bottom crust soggy.
Pour filling into pie.
Roll out other piece of dough.
Place the top crust over the apples.
Tuck excess pastry under the bottom crust and crimp the edges using fingers or a fork.
Make five vents in the top crust to allow the steam to escape.
Place pie on lowest rack of oven and bake at 450°F for 15 minutes.
Reduce heat to 400°F, cover edges with aluminum foil and bake for 30 minutes.
Remove from oven and rest for 2 hours to let set before slicing.
Yields: One 9 or 10 inch pie
Variations:
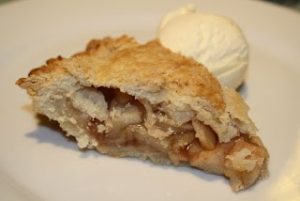
Using fresh apples produced the best results. The apples had a nice texture and sauce was just right.
2. Apple Pie with Frozen Apples – NOT THAWED
Our second favorite method and preferred way of using frozen apple slices. The apples held their shape and were only slightly softer than fresh apples.
Follow the recipe above with the following exceptions:
6-7 cups frozen apples split into pieces, but NOT THAWED
2 Tbsp cornstarch (1/2 Tbsp more than original recipe)
Bake at 450°F for 15 minutes then reduce heat to 400°F and bake for an additional 35-40 minutes or until crust is golden and inside is bubbling. Check the pie at 30 minutes and cover with foil if top is browning too much.
3. Frozen Apples Thawed – Not Recommended
This was our least favorite of the three methods. I thawed the apples in a colander overnight. They lost a considerable amount of liquid, which I did not incorporate back into the pie. I went from 7 cups of frozen apples to 4 1/2 cups of apples. I followed the recipe as shown with the 4 1/2 cups drained apples replacing the fresh ones. This pie cooked up very nicely. The filling was very dark and soft, there were no real apple pieces left. The filling was more like apple butter – tasty but not very appealing for pie. Because I did not reduce the sugar in the filling, it tasted sweeter than the other fillings. Also, the reduced volume of apples left this pie a little concave. It will do in a pinch, but we do not recommend this approach.

frozen, thawed apples
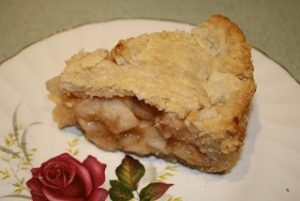
frozen, not thawed
As a baker, I’m thrilled to hear the frozen, not thawed apples worked out so well – I love the fact that I can eliminate the thawing stage. Now I can freeze any extra apples and know that I have a great pie recipe for this winter.
Pie Tips:
• Use a glass or dull-metal pie plate for best results. Aluminum pie plates reflect heat that prevents browning and dark pans may cause too much browning.
• Use a mix of butter and shortening for the best flavor, flakiness and tenderness.
• Keep crust ingredients cold and do not overmix. Overworking leads to gluten formation which will make the dough tough. Overworking or warm ingredients will also break down the fat; it is the pieces of fat that will create tender flakes as it melts.
• To prevent edges from getting too brown, cover edges with a ring of aluminum foil after the first 15 minutes of baking. To make the ring, cut a 12 inch square piece of foil. Cut out a 7 inch circle from the centre. Place on top of the pie.
• Adding some cider vinegar or lemon juice to the crust will help to keep it tender.
• Start baking in a very hot oven 450˚F for 15 minutes and then reduce the heat to 400˚F . This will help the fat create flaky pockets.
• To avoid a gap between the filling and the top crust, try slicing your apples thinner and/or partially cooking the filling before you put it in the pie. Smaller pieces will reduce air pockets and precooking will reduce some of the water content in apples. If you do this, you may need to add more apples than your recipe calls for.
• To prevent a soggy bottom: use a glass pie plate, bake on the lowest rack in the oven, coat the bottom of the pie with butter to seal it before adding the pie filling, cool the pie filling before pouring into the crust, bake at a high temperature.
• Allow pie to cool for 2 hours before slicing into it to allow the filling to set properly.
• Cut at least 5 vents into the top pie crust to allow steam to vent out.
• Line the bottom of your oven with aluminum foil to catch any spills but check your oven manufacturer’s advice first. In some ovens the placing foil on the bottom may restrict the necessary air flow inside the oven. As an alternative, place an oven rack with an empty baking sheet directly below the rack that you place the pie on. That way, if there are any spills the baking sheet will catch them and clean-up will be easier.
*********************
Getty Stewart is a Professional Home Economist, speaker, frequent media guest and writer dedicated to putting good food on tables and agendas. She is the author of several recipe books on enjoying and preserving fruit, Founder of Fruit Share, a mom and veggie gardener. Sign up to get articles by Getty delivered to your inbox. You’ll get recipes, practical tips and great food information like this.
